Step 1:
Let’s start out by creating a new file. I used a 300×300 pixels canvas set at 72dpi, and I filled my background with #395F8B color shade. Now in a new layer set and name it ‘External Hard Drive’.In a new layer draw a gray rounded rectangle with #B1BAC3 color shade and 123 x 137 px dimensions. Then go to Edit > Transform > Perspective, drag the top left transform point to the right to create the second shape shown below.

Step 2:
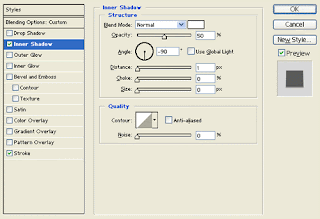
Under Layer Style(Layer > Layer Style) add a Drop Shadow, Inner Shadow, Inner Glow, Satin and Gradient Overlay blending options to your gray rounded rectangle layer.


Result:

Step 3:
Dupicate the perspective gray rounded rectangle shape in its own layer and position it as shown below then add a marquee selection around the original and cut the shape on the duplicate.
Step 4:
Under Layer Style(Layer > Layer Style) add a Drop Shadow, Inner Shadow, Inner Glow, Satin and Gradient Overlay blending options to your small cut out shape from the last step..


Result:

Step 5:
Duplicate the cut out shape design layer and stack them as shown below.
Step 6:
In a new layer draw a dark gray rectangle with #303032 color shade and 102 x 7 px dimensions on the center of the stacked shape designs. Then in another new layer draw a very small yellow circle with #D8FF00 color shade and 4 x 4 px dimensions.
Step 7:
Under Layer Style(Layer > Layer Style) add an Outer Glow and Gradient Overlay blending options to your small yellow circle layer.

Result:

Step 8:
In a new layer draw multiple yellow lines on the other end of the stacked design and apply the same layer styles settings from step seven.
Step 9:
In a new layer draw a blue circle with #00BDFF color shade and 39 x 39 px dimensions.
Step 10:
In a new layer draw a white ellipse with 84 x 72 px dimensions on the center of the hard drive.
Step 11:
Under Layer Style(Layer > Layer Style) add an Inner Shadow and Stroke blending options to the white ellipse layer. Then set the layer’s blending mode to Darken.

Result:

Step 12 :
In a new layer draw a smaller white ellipse with 29 x 25 px dimensions on the center of the hard drive. Then under Layer Style(Layer > Layer Style) add an Inner Shadow and Stroke blending options. Now set the layer’s blending mode to Darken.

Result:

Results:
External Hard Drive Design.


Comments :
Post a Comment